Description
⚡ Power your rig with Patriot Viper Steel — where speed meets style.
- BLAZING 3200 M HZ SPEED - Turbocharge your workflow and gaming with ultra-fast DDR4 performance.
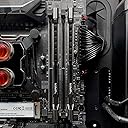
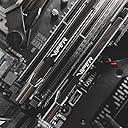
- ROCK SOLID COMPATIBILITY - Tested across Intel and AMD platforms for seamless plug-and-play reliability.
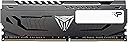
- SLEEK ALUMINUM HEAT SHIELD - Stay cool under pressure with a custom-designed heat spreader that blends style and function.
- LIFETIME WARRANTY ASSURANCE - Invest confidently with hand-tested quality backed by a limited lifetime warranty.
- XMP 2 0 OVERCLOCKING SUPPORT - Unlock effortless performance boosts with one-click automatic tuning.
Patriot Viper Steel DDR4 RAM 8GB (1x8GB) operates at a high-performance 3200MHz with CL16 latency, featuring a custom aluminum heat spreader for optimal cooling and XMP 2.0 support for easy overclocking. Designed for compatibility with the latest Intel and AMD platforms, this UDIMM module ensures stable, reliable performance backed by a limited lifetime warranty.