๐ง Fix like a pro, shine like new โ donโt let your screen repair game fall behind!
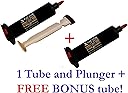
Xfactor Hydro XFUV10BLK 10ml LOCA UV Glue is a premium-grade, ultra-low viscosity liquid optical clear adhesive designed specifically for smartphone and tablet screen repairs. Its 2000 mPa*s viscosity allows bubble-free application and easy cleanup, while the 10ml volume supports multiple repairs. The adhesive cures under UV light or sunlight without yellowing, restoring OEM-level clarity, touch sensitivity, and eliminating visual defects like rainbow effects. Packaged in a black lightproof tube to prevent premature curing, this LOCA glue is trusted by professionals for flawless, long-lasting screen bonding.
| ASIN | B00IOPYLJE |
| Best Sellers Rank | #2,155 in Computer & Mobile Device Repair Kits |
| Brand | Xfactor Hydro |
| Brand Name | Xfactor Hydro |
| Color | 10ml Clear Adhesive |
| Compatible Material | Glass |
| Container Type | Tube |
| Customer Reviews | 3.8 out of 5 stars 690 Reviews |
| Item Form | Liquid |
| Item Package Quantity | 1 |
| Item Weight | 18.14 g |
| Manufacturer | Xfactor Hydro |
| Model | UVXF10g |
| Other Special Features of the Product | Ultra-low viscosity, Excellent gap filling & high light transmittance |
| Part Number | apv-rgl-wcdr00001 |
| Special Feature | Ultra-low viscosity, Excellent gap filling & high light transmittance |
| Specific Uses For Product | Repair |
| UPC | 885514281974 805731900861 885661412832 |
| Volume | 10 Milliliters |
| Water Resistance Level | Not Water Resistant |
L**R
Must Have for Phone Repair
I used the glue to repair my Samsung S3 the glue worked great I had no issues applying the glue to my phone or wiping off excess glue or clearing off air bubbles under the glass. The product came with plenty of documentation and has you tube videos to show you how to use the product. I would recommend watching a few you tube videos before you open the glue. The glue is very viscus, slightly more than water so it moves easy and allows you to press out air bubbles. The glue will not become adhesive until exposed to UV light. The directions recommend the use of a UV light in order for the to become adhesive, I let my phone sit in the sun on a flat surface for 10 min and have not had any issues with it. The gule was more than I needed for my S3, I have a note 5 now and would think I would need the entire tube based on my experience. I would recommend using the glue over the tape adhesive that comes with most replacement screens. I bought this screen and it had the tape type of adhesive. Samsung Galaxy SIV S4 I9500 White Front Outer Lens Glass Screen Replacement CrazyFire Repair Kit Include Screen Lens Glass 1MM Adhesive Tape 7pcs Tools Kit 1 Pair Tweezers 1 Roll Gold Wire Screen Seperator Compatible I337 L720 M919 I545
D**N
Exactly what I needed
Worked great! Due to the low viscosity I was able to get it almost perfect the first try, no bubbles or anything. Like another person stated, I seemed to have a hard time getting it to cure. I thought it was done when I reassembled my phone but a bubble formed in the corner. I was able to push it out, but it came back, and after I did it a few times, the partially cured adhesive ended up stippled in the corner (my fault, I shouldn't have kept messing with it!) Overnight, a bubble formed at the bottom as well, but I did not mess with that one until morning. At that time I pressed the bubble out and held it down in full sunshine and that seemed to do the trick because after that no more bubbles. I am sure I just did not have a UV light of the correct frequency, or did not leave it long enough because it wasn't strong enough. I do not blame the adhesive for that. I DID use too much glue and ended up having to clean a lot of it up from the edges. I didn't think I used that much, but a little bit goes a long way, and the glass will settle onto the LCD and the glue will just keep coming out. I should have tried again with a smaller amount but it came out so good the first time, I didn't want to mess with it anymore. If i was going to do it again, I would have made sure I had the correct light to cure it. I used a little 21 LED flashlight, which some people said they had success with, but either it was not strong enough, or was the wrong wavelength. It seemed to partially cure it, but not enough to keep the bubbles out. The sun seemed to take care of it with no problem though. I would have also used much less and tried again if it wasn't enough. It didn't seem like I used a lot, but it was still way too much. Either way, this is exactly what I needed to fix my phone and I am very happy with the results :)
K**.
Detaches from lcd over time. CHEAP!! and Cures extremely Sloooooow
very poor,, detaches from lcd after cure. Do not buy this brand. Looks great at first but within a week or so it will start to detach from the lcd. We use a lot of loca and lost 14 screens with this brand. Also requires a long cure time under high powered UV light. We use 80w UVs and takes more than an hour. Other locas take about 10 seconds to 1 minute under our lights
G**N
Good product but "Buy 1 Get 1 Free" is misleading.
This is a good quality adhesive and will do a good job. However the "buy 1 get 1 free" advertisement is misleading in my opinion. I thought this meant that I would get 2 syringes each containing 10 milliliters. What you actually get is 2 syringes each containing 5 milliliters. As for the curing, I had trouble with this too, but it was just because I do not have the appropriate UV light. A cheep UV flashlight will not do the job. Also sun exposure takes 2 days to fully cure. Best results i got was using a florescent light bulb (one of thous coiled glass tube light bulbs). Keep the glass/adhesive only a couple inches from the light and let it sit for 24 hours. It should be fully cured after this.
S**E
Tempered Glass Screen Protector Install Experience on Pixel 2 XL *TIPS*
Hi All, So after doing a ton of research on using this along with a cheap tempered glass protector I thought I'd come here and share some observations and tips after a pretty painful and time consuming experience. These are not in any particular order. I'd advise you go onto Youtube and watch a few videos under "DIY TGSP LOCA" to get a sense of the basics. Things to have on hand: Microfiber towels Q Tips (lots) Isopropyl alchohol 91% First, I did this on my Pixel 2 XL. I'd imagine the process is about the same on other similar curved glass phones though. After seeing first hand results I'd advise you buy at least a 2 pack of TGSP's so when you most likely mess up the first time you can try again easily. Try to get a TGSP that does not have complex cutouts near the top/bottom if possible, but not mandatory. Literally any of them will work fine, but some a little better. Don't stress that part too much. Maybe even buy extra LOCA because they send enough for ~4 applications. This particular LOCA is super thick, as advertised, and took literally 30 mins of painfully crawling to the edges. After screwing up though I can say it came off the TGSP and stock screen fairly easily, if not a little messy (even after cured). Most importantly there was no damage. Watch a few youtube videos to get a rough estimation of how much you need, then put a touch more than that. After going through the process though I'm thankful I didn't have something faster. The slow moving nature gave me some working time and allowed me to make small adjustments during the process. The biggest thing I wish someone told me before starting is: Spread the LOCA before putting on the TGSP into a long oval shape up and down your screen! Not only does it cut down on the wait time, but it also prevents the screen protector stock adhesive from touching the screen. If the stock adhesive sets down and adheres, it diverts the LOCA away and basically won't fill, or will leave you with an air bubble. A little extra LOCA will also help with this, although you'll have more to clean later which is not that big of a deal. When first curing the LOCA hold the screen protector in place for the first 10 or so seconds. Think smooth glass on top of a liquid. It floats around if you let it. The 2nd try I got it almost perfect (/w a small bubble I could live with) then it floated and covered up my FF camera during the curing. FML, 45 mins down the drain. This stuff does not budge after any UV hits it. After burning both of my new protectors I decided not to give up and tried to clean one of them. Using a combination of Goo Gone, window cleaner, alcohol and masking tape I can assure you that if properly cleaned they can be reused after a failed attempt. My picture posted is of a reused piece of glass after my 3rd attempt. ***Once you remove the adhesive off the back of the TGSP it will still remain "sticky feeling". This is because of a layer of silicone (or something similar) that keeps it together in the event of a crack!*** Just clean it as best you can, then get the particles off with masking tape, any really small imperfections will get filled in with the LOCA. Push it away from sensitive parts then cure it before cleaning, it's just a sticky mess otherwise. If it looks hazy just clean the front of the glass and you'll see that it goes away for the most part, especially when you apply the LOCA and it gets "wet". If you get bubbles, just take the tip of a clean card or plastic or whatever and submerge it in the LOCA to pull them out or pop them. Really large ones on the surface usually just pop themselves. Final Thoughts: With the future of phones being in curved glass I think this is a must to just learn early on, and at $60 currently for kits, DIY is definitely the way to go. The cured consistency of this LOCA seemed similar, but way stronger, to the glue they use to secure a credit/debit card to the paper when you get one in the mail. You know, the glue you pull off and rub between your fingers before sticking it back on the paper to throw away. The finished product looks like it came from the factory and works perfectly. The clarity is about as good as I could imagine. Hope this helps!
E**A
Works Great When Used Correctly
I want to take one star off because of the lack of instructions that came with this. I actually had quite a hard time the first time I used it, but it was my own user error. I watched several videos and it just was not working for me. Good thing I never cured the glue, so I was able to take off the glass three times, clean, and reapply when nothing worked. If you keep getting air bubbles after following YouTube videos exactly, I suggest using more glue. I tried again and again to apply it just how the videos showed and pressing down with my finger to remove the air bubbles, but they always returned in the bottom corners after a few minutes. Also, spreading the bubbles with my finger caused the glue to cover the camera and seep out of the home button. When I got frustrated, I took the screen off, cleaned everything very well again, then I just put a ton of glue on so that i barely had to touch the glass for the glue to spread. That was what worked for me. The glue spread evenly and didn't get into the home button or the front camera that way. Oh, I forgot to mention that I put adhesive strips on the top and bottom of the LCD as shown in the videos. That helped prevent the glue from spreading the last time when I put a ton of glue, but it didn't help the times that I didn't have enough glue on and had to spread it around a lot with my finger. As for curing: I don't have a UV light, but the sun worked just fine. I just put the phone out in the sun for about an hour and it was fine. You can probably do it for less than that, but I wanted to make sure it would cure since I didn't have a UV light.
A**Y
I had zero air bubbles thanks to this great glue (and patience)
Replaced my wife's cracked galaxy S4 screen and chose this optical adhesive based on product details and reviews. It turned out perfect. I made certain to properly clean the LCD screen and made sure i did not touch the back of the replacement glass upon opening it to set it on the glue. Also I highly recommend having a can of compressed air for electronics so that just before you apply the glue you can give the lcd screen a few shots of air to remove any dust particles that have settled on it since cleaning it. Set the new glass on SLOWLY, I can't stress this enough. There are many videos on youtube that do this and still develop air bubbles. You can press them out if you get them so no need to panic, but I went extremely slow and did not have one single bubble and it beats having to squeeze air bubbles out. I started from the ear piece and worked my way to the home button because it's no big deal if some glue gets in the home button(just squeeze the button down repeatedly with a paper towel to get the glue out), but you do not want to get glue in the ear piece or the front facing camera. Set the glue with a uv light, I used a standard tube black light that I have for Halloween. Repair went great, screen is perfectly clear. I recommend this glue highly.
A**S
Bad batch? Three days of different UV lights doesn't work.
Had high hopes, but now I'm not sure if I got a bad batch. Form the start I was very particular with the application, using a needle-nosed sryinge for accuracy and being sure to use alcohol-wipe & compressed air to remove loose glass or contaminants beforehand. Then I set the phone on a powerful blacklight all night for night 1. That didn't work, so I then in night two I sat my my large UV contractor's urine/spill detection flashlight on the spot. This should've worked right? Well, it's still not hard, being the consistency of old maple syrup on the countertop. Third day: left the phone out in the most powerful UV light I know, the SUN for 2-3 hour increments all. day. long. Still not hardened or scrapes off easy. 2 stars because it comes with two bottles for cheap, but saddened by the results. ๐
Trustpilot
1 month ago
2 months ago