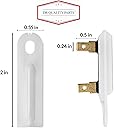
Okay, so my dryer stopped drying. It still ran, but no heat. I cleared out the lint screen, then looked in the pocket that held the screen. It was packed with lint and other debris. I got out the vacuum, and cleaned it out. Fired up the dryer, and…still no heat. Fearing the worst, I took to the Interwebs for help. The most common failure is this fuse. If the dryer overheats (usually due to blocked airflow in the exhaust system) this fuse blows and the heat stops working. Flashlight, pen, and paper in hand, I gather the model number. Finding a parts diagram, I find the part number for the fuse. On an appliance parts website, I locate the part number for the OEM fuse. 26 bucks + shipping + unknown delivery time. On a whim, I check Amazon. Under 6 bucks, next day delivery. No brainer. Now, my dryer is located in a short hallway between the garage and the kitchen, up on a stand about 14” high, between the water heater and the washer. There is no room to work on it as it stands. I will describe my repair procedure. Day One: First off, I decided to build a box out of some scrap lumber I had laying around. This would allow me to slide the dryer into the hall, and be able to work behind it. This took about an hour. I put to box in the hall, and wiggled the dryer on to it. Now I could get behind it comfortably. Unplug dryer. Remove exhaust tube. Disconnect gas line. Here’s where it got a little tricky. There is an elbow on the gas pipe, and an adapter. The back of the dryer will not come off with these in place. So out comes the PB Blaster. A half hour later, I am able to unscrew the adapter, and then the elbow. Now to the back panel. 3 screws hold the top on, out they come, and off comes the top. There are about 14 screws holding the back on, off they come. Once the screws are removed, disconnect the black and white power wires from the panel (take a picture so you can remember which wire goes where). I lift out the back panel and set it aside. Now the heat distribution pipe has to come off, 3 screws and lift it out. Now to find the fuse. Out from behind the dryer, I rotate it 45 degrees to the east. Flashlight in hand, I locate the fuse. One screw and I pop it out. Pull the fuse towards me, and attempt to take the blade connectors off, but they wont budge. More PB Blaster and another half hour. Stull stuck, I get the needlenose ViceGrips, and am able to work it off. Get out the multi meter and fuse shows no continuity. Great! This is the problem! Since the fuse won’t be here until tomorrow, I slide the partially disassembled machine back in place and take the box outside. Total work time today- About 3 hours, with about an hour of that making the work platform, and some time waiting for the PB Blaster to work it’s magic. Day Two: Bring the box in place, slide the dryer onto it. Hook fuse to wires, and put in place. This was a little tricky, as the exhaust from the blower was behind the vent tube, about elbow deep in the center of the dryer. My first plan was to put a dab of bearing grease on the hole in the fuse to hold the screw in place while I set the fuse. This didn’t work out. After several attempts, I couldn’t get the fuse to “seat” in place. Once I figured out that there was a tab on the west side of the fuse, I got it seated, and the screw went in on the second attempt. Re-assembly was pretty straightforward- attach the heat distributor (3 screws), place the back panel on, attach the power leads, 14 screws for the back, three screws for the top. Re-attach the gas pipe elbow, the adapter, and the gas hose. Re-attach the dryer vent, slide back into place. Turn on gas, check for leaks, and fire it up. Success! Total time about 4 hours. The location of my laundry set up made this job far more difficult than it “should” have been. If I could rotate the thing where it stood, it would have been much easier. The time spent actually working on disassembly, removal and replacement of the part, and reassembly was about 2 hours. Some of that time was spent wrestling the dryer itself. The placement of the fuse is in a very difficult place to access also contributed to the time taken. AS for a review of the product- it works as intended, and was much cheaper than the OEM part. I don’t know how you assign a star rating to something that works as intended, so I’ll give it a 5, because it worked out of the box, was delivered next day, and was significantly cheaper than the OEM part.