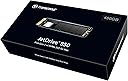
🚀 Upgrade your Mac’s heartbeat with Transcend JetDrive 850 – speed meets sleek storage!
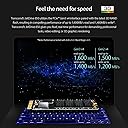
The Transcend TS480GJDM850 JetDrive 850 is a 480GB NVMe PCIe Gen3x4 SSD designed specifically for Mac users, delivering up to 1600 MB/s read and 1400 MB/s write speeds. Compatible with MacBook Air, MacBook Pro, Mac Mini, and Mac Pro models from 2013 to 2017, it includes installation tools and supports macOS High Sierra (10.13) or later, making it the ultimate upgrade for revitalizing your Mac’s performance.


| ASIN | B07DCKLWQN |
| Additional Features | Portable |
| Best Sellers Rank | #2,078 in Internal Solid State Drives #36,627 in Computer Internal Components |
| Brand | Transcend |
| Built-In Media | JetDrive 850 SSD, Screwdrivers (T5 & P5), Quick Installation Guide, Warranty Card |
| Cache Memory Installed Size | 480 |
| Compatible Devices | Compatible with MacBook Air 11" & 13" (Mid 2013 - 2017), MacBook Pro (Retina) 13" & 15" (Late 2013 - Mid 2015), Mac mini (Late 2014), Mac Pro (Late 2013);PCIe Gen 3 x4, NVMe interface;Up to 1600 MB/s read and 1300 MB/s write speeds;3D NAND Flash memory;Installation tools included;Compatible with devices running macOS High Sierra (10. |
| Connectivity Technology | NVMe |
| Customer Reviews | 4.3 out of 5 stars 757 Reviews |
| Data Transfer Rate | 1600 Megabits Per Second |
| Digital Storage Capacity | 480 GB |
| Form Factor | 2.5-inch |
| Global Trade Identification Number | 00760557841821 |
| Hard Disk Description | Solid State Hard Drive |
| Hard Disk Form Factor | 2.5 Inches |
| Hard Disk Interface | NVMe |
| Hard-Drive Size | 480 GB |
| Hardware Connectivity | PCI Express x4, Solid State Drive |
| Hardware Platform | Mac |
| Installation Type | Internal Hard Drive |
| Item Type Name | JETDRIVE |
| Item Weight | 0.02 Pounds |
| Manufacturer | Transcend Information |
| Media Speed | 1400 Megabytes Per Second |
| Mfr Part Number | TS480GJDM850 |
| Model Name | JetDrive 850 |
| Model Number | TS480GJDM850 |
| Number of Items | 1 |
| Read Speed | 1600 Megabytes Per Second |
| Special Feature | Portable |
| Specific Uses For Product | personal, gaming, business |
| UPC | 760557841821 |
| Warranty Description | Five-year Limited Warranty |
A**A
850 960GB version
I bought this for my Macbook pro mid 2014 (Mac OS Mojave). How ever in the macOS Recovery mode, this SSD could not be recognized. So Time machine backup isn't of much help. To make it work, do not install the 850 SSD just yet. First you make a bootable backup (clone) your original SSD to an external hard drive by using Carbon Clone Copy (their backup is bootable). Then you can replace the 850 SSD for your Macbook. After the new 850 SSD installed, boot the Macbook with your external hard drive (the clone is bootable), use Disk Utility app to format the 850 SSD to APFS, then restore backup(clone) to your new 850 SSD. Once it's finished, shut down your Macbook, disconnect the external hard drive, turn on the Macbook, if you see the apple logo and your login screen, voila! PS, An external SSD will make the whole progress faster! If the time machine restore could work, it could be easier.
R**Y
You CAN restore files from Time Machine with this SSD given the right steps
I decided to switch to this brand of SSD after having the same PANIC NVMe issues with the OWC Aura Pro as others have mentioned in their reviews. I would like to add that it's nice the two screwdrivers needed to remove the MacBook Pro cover and T5 screw on the motherboard are included with the drive. I'll do a follow up review in a few weeks after observing performance and general use. I would like to comment on how others have mentioned they can't use this SSD out of the box or do a Time Machine restore and they only method to get this SSD functional is to clone the original volume. While cloning one volume to the other is ONE effective solution. I would like to offer another solution that DOESN'T require cloning and will allow you to restore your macOS Time Machine Backup. First off, it's important to note fresh drives from the manufacturer are not formatted and do not have any sort of partition scheme. Hence, why you can't just place this SSD in your MacBook and boot it up and expect it to work. The macOS recovery partition would need to be installed in order to get any boot options and since this drive out of the box is bare, I will walk you through the steps I took to get it to a functional state and a successful Time Machine restore. Step 1) You'll need to create a flash boot drive with the applicable macOS install files. There are two methods for doing so: A) Download the "Diskmaker X" Application, which is a GUI interface for creating a bootable USB flash drive with the macOS install files. B) If you comfortable using the terminal command line, there's a simple one line command you can copy and paste from the following Apple Support article: https://support.apple.com/en-us/HT201372 ** It's important to note, you must download the "installer file" from the App Store onto your machine in order for this to work. And once a previous macOS version is no longer supported, you will have a hard time finding it on the App Store since Apple will remove it. Once you have your macOS Bootable USB Flash drive created, you are ready to proceed with the next step. Step 2) Provided you have installed the new SSD in your MacBook, you can now boot up your MacBook with the bootable USB drive also inserted into a USB port. Power on your MacBook and once you hear the Apple boot chime, press and hold the "option" key which will bring up a prompt to allow you to boot from the USB flash drive. You should see an icon with the application macOS version (i.e. Install macOS Mojave). It will take a few moments to load the applicable installation files and then launch the macOS utilities menu. Important!: You will first need to prep your drive with Disk Utility. Step 3) Open Disk Utility app. By default, Disk Utility only lists Volumes. You will want to see all devices by selecting View on the upper menu bar and select "Show all Devices". This will now display the hardware ID for the SSD "TS480GJDM850 Media" in the left column. Highlight this hardware by selecting it and then click the "Erase" button. You will then be prompted to give the SSD a name (i.e. Mac SSD), select the macOS partition type (Mac OS Extended Journaled) and change the Scheme from Boot Record to GUID Partition Map. Click Erase. After a few minutes this should prep the SSD for installation of the macOS. When complete, exit Disk Utility. Step 4) You are now ready to install the macOS Operating System. Select "install macOS", review the licensing agreements and proceed. You should be able to select your newly formatted and prepared SSD drive. After a while, the base operating system files will be installed on the SSD and you will have an option at that point to restore your files from time machine. There is an option to restore from Time Machine from the Utilities Menu at the completion of Step 3 above, but I elected to install fresh new operating system files first. Simply technique. Step 5) Your Time Machine files will be restored from backup after several hours and you should be good to go at that point! Hope this new information helps others.
L**O
Good hardware, there are better out there
There are better options out there. This one works as advertised, but it's better to buy the one that comes with the external case even if you already have one. The 850 doesn't come with the external case (Even though that isn't entirely clear from the publication)
L**R
Did not work, but they were great about allowing me to return it
Thought this SSD would work for my 2014 Macbook pro, but when I inserted it my machine could not read it. Brought it in to apple and they also were unable to get it working. I sent it back, and very promptly had my full purchase price refunded. I cannot say for sure where the problem is; might have been a bad SSD, might have been incompatible, or might have been some other issue in my laptop. In any case, I really appreciate the ease of the return, and the fact that there was no restocking charge. So, even though it did not solve my problem, I am still giving 5 stars.
J**Y
It is like a new computer for $350
I have a 2014 11" Macbookair. I sprung for the 8GB of ram and the faster intel chip but skimped on the hard drive. The 128gb was never enough. I constantly had to monitor my space especially since I run windows 7 side by side with Mac OS using parallels. So obviously having 400gb is an immediate change but the biggest change is overall performance and speed. It is a completely different and much improved machine. If you purchase for your macbook I would suggest using an external hard drive that you can boot off of and the use Carbon Copy to format the new hard drive.
R**N
Having Serious Trouble After Only a Year
I bought the 480 GB drive and installed it about a year ago after purchasing a macbook air when my previous computer died. I needed more harddrive space than the laptop came with, and these had good reviews so I bit the bullet and purchased one. It worked reasonably well -- though a little slower than the original HD -- until recently, when my computer has started shutting down once or twice (sometimes more) a day and going to the mac screen with the folder with a blinking question mark, indicating it can't find the boot drive. I have checked for other causes, including malware, and haven't found anything. The drive is not even full, and still has over 100 GB free, so I haven't worked it too hard yet or even partitioned it for another OS like I have done in the past. Anyway, the consensus seems to be that these random shutdowns are a sign of a failing hard-drive. In the case of an Apple product, they would replace it was defective, but if you buy this 3rd party seller you're basically out in the cold. I wouldn't be surprised if others have similar issues over time. As folks often like to say, let the buyer beware.
S**K
Great product
Great product. I was thinking owc by saw many negative comments so I bought this one. But I would advise unless you know Mac very well otherwise try to buy 855 (850 with case). The migration (old to new add) will be much more smoother. I backup my old sdd by time machine and super duper none of them work at the end so I have to re-install.
K**N
Wouldn't work...
I bought this to replace another brand's SSD drive for my Macbook Air -that one failed twice, each time after a year or so. Unfortunately, despite lots of email support from Transcend, I wasn't able to make it work. Apparently you need to have a "clone" backup on an external drive, rather than simply a "Time Machine" backup in order to make this brand work. So I had to send it back. That wasn't a problem with the previous brand.
W**L
Fast but power hungry. Instructions lacking.
Fast. Amazing upgrade for the mid-2013 Macbook Air. Gives the laptop a new lease on life in 2019. Install is straight forward if you are a versed computer person. Included instructions are missing some key steps. I needed to install Transcend's SSD utility, make a bootable clone via superduper!, install drive, boot from clone, format SSD and enable TRIM, reboot to clone, copy clone to SSD. Be aware this SSD is very power hungry. My Air still had decent battery life until I installed this drive. Approximately cut battery life by 20%. One star off for this.
P**6
Need a bootable Image to install OS onto the SSD without enclosure
I use the 850 240gb drive to replace the 128gb sands drive in my 2015 MacBook air 11 which actually only supports pcie gen 2 x4, throttling this drive's pcie gen3 x4 top performance. The speed of this drive when installed is measured as read 1400mb/s, write 750mb/s, which is very respectable considering the old platform it runs on. The build quality of this drive is actually more solid than the official drive. The pin is shiny gold plated. It also comes with two necessary high quality screw driver. So no need to buy extra tools. I rely on one 16gb and one 256gb external ssd for installing the OS mojave on to the new drive. I create a full time machine backup before everything. Then I create a bootable installation usb drive with the 16gb following the official guide about creating bootable installation media on Apple website (google create bootable installation Mojave). After the Mojave installation USB drive has been completed, I install the new ssd to the MacBook air. Then I boot from the created bootable usb drive, which goes into a recovery interface. Under the recovery interface, I use disk utility to erase the 850 drive to the required format (just leave on the default setting). After this step the I can install macOS on to the new drive. When the newly installed OS first boots, it will prompt you to backup from a time machine backup. Then simply plug in the time machine backup and leave the rest to the system. After restoration completed, I get a clean installed Mojave machine in a state exactly like where I left off. It boots exactly like the original drive with no black screen or abnormality. This method does not require 3rd party software. But it does need copy and paste command in Terminal. The bottom line is you need a bootable image from which you can restore (install) to the new drive.
M**O
Perfetto per Macbook Air 13 Early 2015
Ho preso questo ssd per sostituire quello da 128gb montato di serie sul mio Macbook Air 13 Early 2015. Seguendo le istruzioni presenti sul sito Transcend si riesce ad installare facilmente anche senza il case (versione 855). Io non ho ripristinato da Time machine ma ho preferito, dopo l'inizializzazione da recovery ed aver riavviato, installare, sempre da recovery, il sistema operativo da zero scaricandolo da internet con la procedura guidata. Non ho riscontrato nessun problema di affidabilià, surriscaldamento o consumo anomalo della batteria. Il disco originale scriveva e leggeva a circa 700 m/s questo nuovo Transcend arriva a 1300 m/s in lettura e 1600 m/s in lettura. Per ora sono molto soddisfatto speriamo duri nel tempo!
F**C
Ist schnell und wird voll erkannt von macOS
Ich hatte in meinem Mac Pro (late 2013) eine 512 GB SSD ab Werk verbaut. Irgendwann hatte ich festgestellt, dass immer mehr Speicher belegt wird, obwohl ich Fotos, Videos und Musik auf meiner Thunderbolt RAID Laufwerken speichere. In der Console.app tauchten immer wieder Fehlerberichte von einem hdd deamon auf. Ich vermuttete, dass meine SSD nach 6 Jahren so langsam den Geist aufgibt. Also habe ich mir das JetDrive 850 gekauft. Nach der Installation habe ich dann macOS aus dem Internet brand neu aufgesetzt und die Installation hat die SSD ohne Probleme erkannt. Die SSD ist laut Benchmarks schneller als die SSDs die Apple verkauft/verbaut aber davon merke ich im Alltag nicht viel. Mehr Speicher, nicht langsamer, ohne Probleme von macOS erkannt. 5/5 Nach 2-3 Monaten tauchten in der Console.app dieselben Meldungen auf wiezuvor. Die Ursache ist Apples AFPS. Der Nachfolger von HFS+ und angeblich auf SSDs optimiert. AFPS verlangsamt mit der Zeit, weil AFPS Metadaten nicht zentral verwaltet sondern mit jeder Datei und jedem Verzeichniss an der Stelle speichert, wo die Datei und das Verzeichniss auf dem Datenträger gespeichert sind. Das bedeutet, dass das Auflisten von Verzeichnissinhalten länger dauern. Bei Ordnern dessen Inhalt sich öfters ändert vermüllt AFPS die Meta Daten mehr und mehr. Ein typisches Beispiel für einen solchen Problem Ordner ist der Download Ordner. Ich habe mir also diese SSD gekauft weil Apple Microsoft's NTFS verhalten nachgebaut hat xD
C**.
Works
Works well. Was a real bitch to get it to work with Apple Mac. Transcend should document the tricks needed to install. but persevered and got it to work.
Trustpilot
1 month ago
2 weeks ago